![]()
![]()
|
|
|
![]() Module(s): Basic: Walls, Openings, Components
Module(s): Basic: Walls, Openings, Components
You can use ![]() Smart Window and Door Symbols to quickly and easily create your own smart symbols for openings of any shape or size. The actual process of modeling the smart symbol is done in a dialog box.
Smart Window and Door Symbols to quickly and easily create your own smart symbols for openings of any shape or size. The actual process of modeling the smart symbol is done in a dialog box.
So you create its components one after the other: universal frame, door frame (with/without sill), horizontal elements, vertical elements, muntins, vertical and horizontal dividers door leaves and lots more!
Click ![]() to create the component. Click
to create the component. Click ![]() to discard components you have already created.
to discard components you have already created.
A 3D preview and various plan views show how the smart symbol currently looks.
The program immediately inserts the finished smart symbol in the opening. You can also save it and retrieve it later.
To create smart window or door symbols
The opening’s parameters are copied.
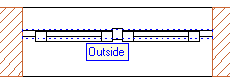
Note: In the case of double windows, you can specify whether the elements are to be created on the inside or outside.
Note: Click ![]() to finish a component and move on to the next component.
to finish a component and move on to the next component.
If you click ![]() Undo, you can undo the changes you have made step by step.
Undo, you can undo the changes you have made step by step.
This inserts the smart symbol in the opening.
Note: The reference point is particularly important for smart symbols with casements and door leaves, as the position of the smart symbol in the opening also defines the opening direction.
Tip: If necessary, increase the reference scale (status bar) to, say, 1:20. This is the scale at which the position of the casement is displayed in plan view. You can also zoom in on the smart symbol in isometric view.
If necessary, the position of the smart symbol in the door opening is adjusted to the swing symbol.
Tip: You can use ![]() to save intermediate results to the smart symbol library.
to save intermediate results to the smart symbol library.
Note: Click ![]() to retrieve, modify and save smart symbols created with
to retrieve, modify and save smart symbols created with ![]() Smart Window and Door Symbols.
Smart Window and Door Symbols.
Modifying the door swing without redrawing the door opening or smart door symbol
| (C) Allplan GmbH | Privacy policy |
