![]()
![]()
|
|
|
![]() Module(s): Special: Walls, Openings, Components
Module(s): Special: Walls, Openings, Components
You can use ![]() Opening Designer to design door and window openings by entering parameters for facing blocks, rabbet shapes, roller blind housings, lintel and header elements and so on. You can save these openings and retrieve them whenever you need.
Opening Designer to design door and window openings by entering parameters for facing blocks, rabbet shapes, roller blind housings, lintel and header elements and so on. You can save these openings and retrieve them whenever you need.
To design an opening
A preview of the opening is attached to the crosshairs. The direction of the opening is also displayed. (This is important for openings in walls with multiple construction layers where the offset value in each layer is different.)
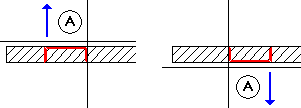
Wall line clicked = exterior side of opening
The Opening Designer dialog box appears.
This enables the tools for defining the components.
Note: If you click ![]() Window or
Window or ![]() Door directly, the relevant Properties dialog box is displayed and you can modify the opening's parameters.
Door directly, the relevant Properties dialog box is displayed and you can modify the opening's parameters.
You can select the following tools:
Note: If you have already defined components, just click the component you want to modify with the right mouse button in the graphics area of the Opening Designer dialog box. The Properties dialog box of the component clicked is opened and you can change the parameters according to your demands.
Tip: When you click a smart symbol with the right mouse button, you can use the shortcut menu to delete or replace the smart symbol or to modify its reference point.
Tip: Select a suitable elevation or isometric view if you want to click a lintel/header or roller blind housing.
The preview can be controlled as follows:
Note: Only one facing, roller blind housing or lintel/header can be created per construction layer. The rabbet can be created on each side of a construction layer (i.e., two per layer).
The Save dialog box appears.
This saves the opening as a favorite and inserts it in a wall at the same time.
Note: Use ![]() Open Favorite File to retrieve openings you have already designed and saved as styles.
Open Favorite File to retrieve openings you have already designed and saved as styles.
Note: If you exit the Save dialog box with Cancel, the opening is inserted in the wall but not saved.
Note: Door and window openings are saved in separate folders.
Note: For quantity takeoff operations that are compliant with German building regulations, check that the openings are within the components.
| (C) Allplan GmbH | Privacy policy |

